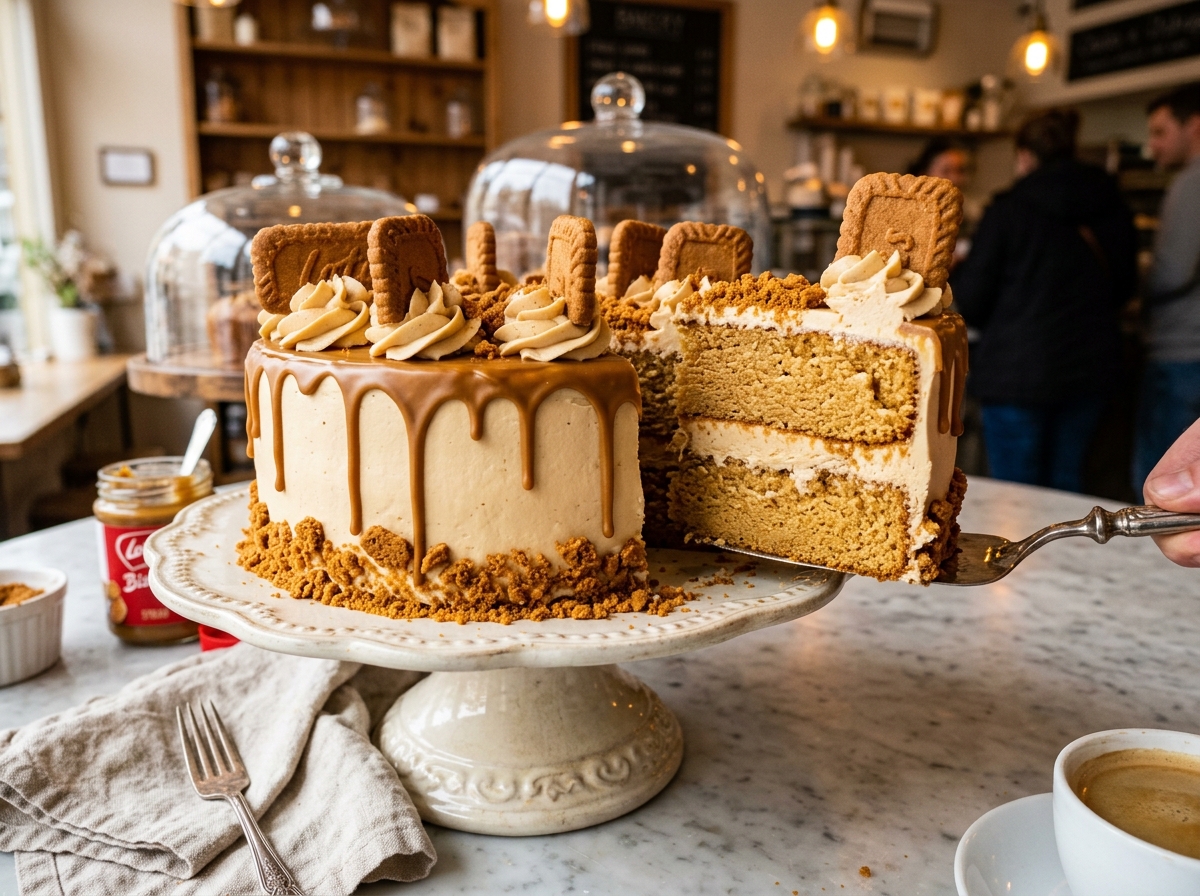
Ultimate Creamy Lotus Biscoff Layer Cake
✨ Why This Recipe Works
Ultra-moist caramel-infused golden sponge layers filled with a thick, velvety Biscoff buttercream, warm cookie butter drip, and cookie crunch.
Crafted with everyday pantry staples and perfected in Mery's home kitchen, this Ultimate Creamy Lotus Biscoff Layer Cake brings authentic comfort and vibrant flavors straight to your table. Every step has been carefully timed and measured so home cooks of any skill level can recreate foolproof, delicious results with ease.
With a quick 45 minutes of prep and 35 minutes of cooking, this wholesome dish balances ease and rich flavor without requiring complicated culinary equipment.
📜 Deep-Dive Food History • 🌲 Wild Foraging & ASMR Cooking • 🍲 Ancient Recipes Brought to Life
🥗 Ingredients (tap to check off)
- 2.5 cups All-purpose flour
- 2.5 tsp Baking powder
- 1/2 tsp Baking soda
- 1/2 tsp Fine sea salt
- 1 cup Unsalted butter (softened to room temperature)
- 1.25 cups Granulated sugar
- 1/2 cup Light brown sugar (packed)
- 4 pcs Large eggs + 1 egg yolk (room temperature)
- 1 tbsp Pure vanilla extract
- 1 cup Whole milk (room temperature)
- 1/4 cup Neutral vegetable oil
- 1.5 cups Unsalted butter (softened)
- 1 cup Smooth Lotus Biscoff spread
- 4.5 cups Powdered sugar (sifted)
- 1/3 cup Heavy whipping cream
- 1 tsp Pure vanilla extract
- 1/4 tsp Fine salt
- 1/2 cup Smooth Lotus Biscoff spread (melted gently for drip)
- 12 pcs Lotus Biscoff cookies (whole & roughly crushed for garnish)
👨🍳 Step-by-Step Instructions
Prep & Whisk Dry Ingredients
Preheat your oven to 350°F (175°C). Grease two 8-inch round cake pans and line the bottoms with parchment paper. In a large bowl, whisk together the flour, baking powder, baking soda, and salt.
Cream Butter & Build Batter
In a stand mixer with paddle attachment, beat softened butter, granulated sugar, and brown sugar on medium-high speed for 3 minutes until pale and fluffy. Add eggs and yolk one at a time, followed by vanilla and vegetable oil. Alternate adding dry ingredients and milk in 3 batches on low speed, mixing just until combined.
Bake & Cool Golden Sponges
Divide batter evenly between prepared pans. Bake for 30 to 35 minutes until a toothpick inserted into the center comes out clean. Cool in pans for 10 minutes, then invert onto wire racks to cool completely.
Whip the Silky Biscoff Buttercream
Beat softened butter and smooth Biscoff spread on medium speed for 2 minutes until creamy. Gradually add powdered sugar alternating with heavy cream, vanilla, and salt. Beat on medium-high speed for 2–3 minutes until ultra-fluffy, glossy, and smooth.
Assemble the Thick Creamy Center
Place the first cake layer on a serving platter. Pipe a generous dam of Biscoff buttercream around the rim, then fill the center with a thick, luscious layer of frosting. Top with the second cake layer. Apply a thin crumb coat and chill for 15 minutes, then frost the exterior smoothly.
Drizzle, Garnish & Serve
Gently warm 1/2 cup of Biscoff spread until fluid and spoon around the top edges to create a natural caramel drip. Pipe buttercream rosettes on top, crown with whole Lotus cookies, and press crushed biscuits along the bottom border. Chill 20 minutes, slice, and enjoy!
🍰 Storing & Chilling Desserts
Refrigeration: Keep covered in an airtight container or under a cake dome in the refrigerator for up to 4 to 5 days.
Serving Tip: For the richest flavor and silkiest mouthfeel, allow refrigerated bakes to rest at room temperature for 15 minutes before serving.
🍳 Recommended Kitchen Equipment
Kitchen Note: Having the right kitchen tools ensures foolproof results. We recommend items tested in our own home kitchen.
📊 Nutritional Breakdown (Per Serving)

🍽️ You Might Also Love

⭐ Tried This Recipe? Rate & Review
We’d love to know how it turned out! Leave your star rating, helpful tips, or fun ingredient swaps below for fellow home cooks.